“Mom, your strawberry jam is the best!”. Words every mother loves to hear. If only it were about every meal I make, then I’d be getting somewhere with these kids of mine! I’ll take what I can get for now, though. In this recipe, you’ll find homemade strawberry jam that is easy to make using only 3 ingredients and no pectin. Enjoy a free printable label for your jars!

This blog contains articles with links that earn me a commission when you use them at no additional cost to you.

How is homemade strawberry jam made?
- Fresh (or frozen) strawberries
- sugar
- lemon juice
Cook the heck out of those berries. Stir constantly. Ladle into jars. Water bathe to preserve long term. Done! Simple, right?
It is!
Strawberry Jam Recipe with no pectin
4 cups fresh strawberries (frozen is fine to use but cook time is double)
1 1/2 cups of sugar
1/4 cup of lemon juice
*I generally double this recipe so that we have plenty of strawberry jam to last throughout the year.

Instructions:
Start by, putting the strawberries in a large sauce pot and use a masher to smush your berries a little. If using frozen berries, add the berries to the pot and allow the berries to cook down for about 5-8 minutes before mashing.
Next, add sugar and lemon juice to the jam pot. Cook on medium heat, stirring often for about 5 mins, or until sugar is dissolved.
Then crank up the heat to medium-high and bring to a rapid boil. At this stage, you will not want to leave your post as you will need to stir constantly or else your jam will stick to the pot. Continue to mash any chunky strawberry pieces.
Stir until jam thickens and the top of your jam is completely covered in bubbles. This can take about 20 mins (for frozen berries, the cook time is close to 40 minutes).
Perform the plate test for readiness (see below!)
When the strawberries are jammed up, turn off heat and ladle jam into sterilized jars, leaving 1/2 inch headspace.
I these jelly jars as my family loves this jam so much, we eat it often. If I am gifting some, I will use 4 ounce jelly jars.
This recipe makes about three 8 ounce jars and one 4 ounce jar. If doubling the recipe, six 8 ounce jars and two 4 ounce jars. When a jar cannot be filled to the top, leaving a 1/2 inch headspace, put this jar into the refrigerator to eat first.

Plate test for readiness:
I highly recommend putting a small plate in the freezer before you start your jam process. When you think the jam is ready, remove the jam pot from heat, get the plate from the freezer, and drizzle a little jam on it, about a quarter sized amount is good. Put the plate back in the freezer for about one minute. Remove the plate again, hold the plate sideways, and run your finger through the jam (be sure to taste test!). If the line you made fills back in with jam, you should cook the jam for about 5 minutes longer and test it again. If the jam feels a little like gel or jelly, it is ready to jar. You can also use a thermometer to measure to 220 degrees F.
If you believe you have overcooked the jam and it feels gummy or super thick, add 1/4 cup of water to the jam pot and stir to loosen the harden sugar. Add more if you feel it is needed.
A note about mason jars
I love to thrift shop!
Anytime I go into a thrift shop, I always check out their kitchenwares section, searching for jars. I am specifically looking or mason jars in brands like Ball and Kerr. Make sure to inspect each jar for cracks or chips.
Bring them home and soak in a soapy mixture for 1 hour then wash like normal. Then I put them in the dishwasher for a sanitize cycle. I like to make sure they are EXTRA clean before I store them away.
Last summer I scored 69 jars of all sizes for less than $17 at my local thrift shop!
How do I store my strawberry jam?
This recipe can easily go straight to the fridge. I always let one 12 ounce jar cool and lid it to be used immediately.
The rest I will water bathe for long-term pantry storage.
You may also freezer-store this recipe too right in the glass jar! Just be sure to save headspace for expansion. At least an inch.
Water bathing jam
I love to make extras of this jam to have on hand so water bathing a few jars is important.
Here’s how I do it:
- wash jars and lids. You can sterilize in your dishwasher or I like to bring my water canner to a boil while cooking my jam and sterilize my jars and lids in there. Make sure to allow time for them to dry upside down on a kitchen towel.
- Ladle jam into jars, leaving 1/2 inch headspace. Use a small-head spatula to gently remove air pockets from the jam inside the jar.
- If foam or bubbles are present, some people scoop it off. Others leave it. It’s an aesthetics preference and does not affect quality of the jam.
- Use dampened paper towel or clean kitchen towel to wipe the rim of each jar.
- Add each lid and secure with a ring until just fingertip tight. (Not too tight, not too loose.)
- Bring water canner to a rapid boil and process jars for 5 mins. Turn off the heat and let jars sit in water for another 5 minutes. (Know your altitude boiling points for lower/higher altitudes).
- Place kitchen towel wherever out of the way for your jars to rest. Put jars on kitchen towel then use another towel to cover the jars.
- Let jars sit for 24 hours or until cool.
- Test seal after completely cool by pressing the center. If it is sealed, label jam jar with name and date then store in the pantry. If the metal bubble bounces back or you seal it yourself by pressing it, go ahead and add to the fridge for immediate use.
- You may attempt to re-process any unsealed jars in a water bath again IF the jars have sat for less than 24 hours.

How long will my jam last?
If opened and using, in the fridge for 10-14 days is best (but we usually go longer!).
If sealed in the fridge, 1-3 months.
Water bath processed, sealed, and in the pantry, for 1 year. Be sure to look for spoilage before consuming or unsealed jars in the pantry. Mold growing on jam surface or lid top, smells bad, or just doubtful; do not eat. Discard immediately.
But know this- your kitchen, your rules when it comes to what you’re comfortable with preserving foods.
Ways to enjoy your Homemade Strawberry Jam
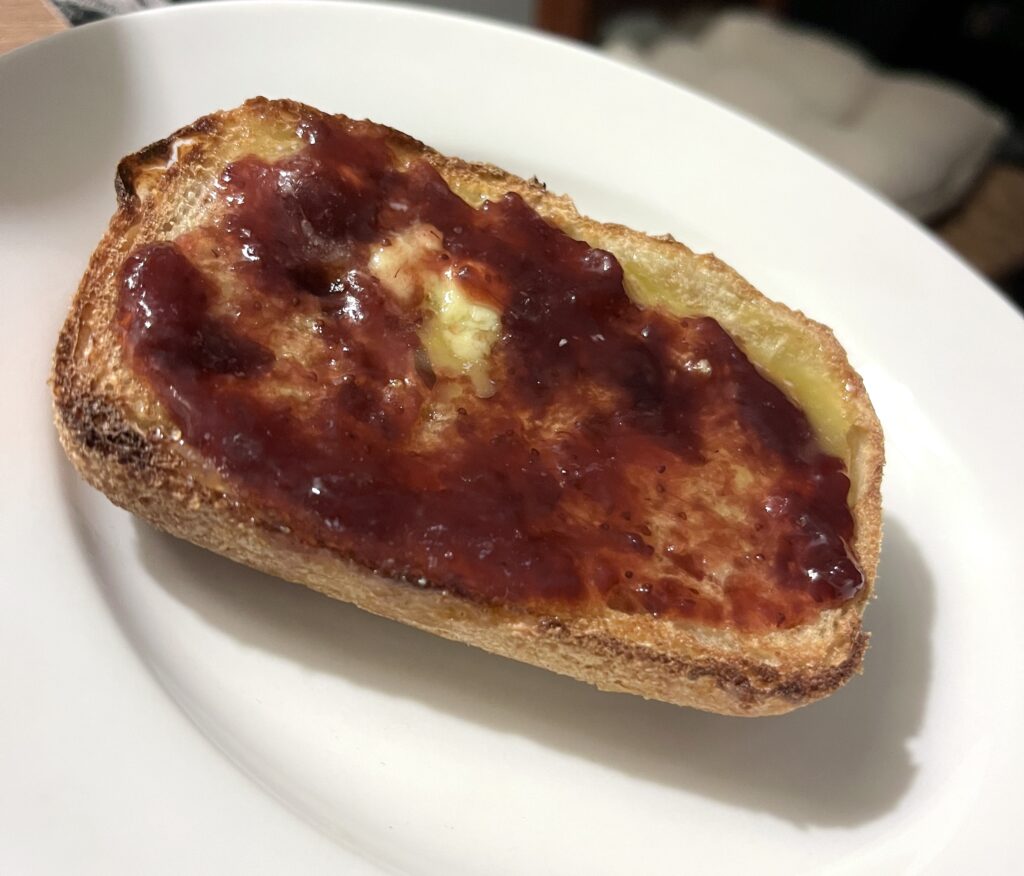
- on toast with homemade butter
- drizzle over vanilla ice cream
- in cheesecake
- in yogurt with granola
- on pancakes, skip the maple syrup!
Additionally, I like to undercook my jam to make a thicker strawberry syrup for pancakes and ice cream. I’ll ladle out on jar worth and then continue to cook down my berries. Let cool before storing in the fridge.

Like easy fruit jam recipes? Try these
Easy is my favorite kitchen word. Can you relate?
Try apple jam or dandelion jam or blueberry jam or Christmas jam!

Pin this for later!
Don’t forget to pinch that FREE PRINTABLE LABEL at the top! Simply save then print on your own labels. I really love avery.com‘s print your own option.
Pin this to your Pinterest and share on social media! If you try it, come back here and rate this recipe. Leave me a comment too! Find me on Facebook and Instagram and give me a tag @johnsonhomeNC.


Strawberry Jam with NO Pectin
Ingredients
Equipment
Method
- Put your strawberries in a large sauce pot and use a masher to smush your berries a little.
- If using frozen berries, add to the pot and allow berries to cook for about 5-8 minutes, giving them a stir occasionally .
- Next, add sugar and lemon juice. Cook on medium heat, stirring often for about 5 mins, or until sugar is dissolved.
- Then crank up your heat to medium-high and bring to a rapid boil. At this stage, you will not want to leave your post as you will need to stir constantly or else your jam will stick to the pot. Continue to mash any chunky strawberry pieces.
- Continue to stir until jam thickens and the top of your jam is completely covered in bubbles. This can take about 20 mins. If using frozen berries, cook time is about 40 minutes.
- PERFORM PLATE TEST AFTER 20 MINS: I highly recommend putting a small plate in the freezer before you start your jam process. When you think the jam is ready, remove the jam pot from heat, get the plate from the freezer, and drizzle a little jam on it, about a quarter sized amount is good. Put the plate back in the freezer for about one minute. Remove the plate again, hold plate sideways, and run your finger through the jam. If the line you made fills back in with jam, you should cook the jam 5 minutes longer and test again. If the jam feels a little like gel or jelly, it is ready to jar. You can also use a thermometer to measure to 220 degrees F. If jam feels super thick or gummy, add 1/4 cup of water to the jam pot and stir. Use more water if needed to loosen the harden sugar.
- When your strawberries are jammed up, turn off heat and ladle jam into sterilized jars, leaving 1/2 inch headspace. Lid, ring, and allow to sit for 24 hours or until completely cooled, undisturbed.
- Sealed jars can be labeled, dated, and stored in the pantry.
- Any unsealed jars may be water bath re-processed if it has not been 24 hours. Or store in the refrigerator to eat first.